I learned how to do this a while back so I decided to post how to do it.
Step 1
Open a new file the size of the document doesnt matter, mine is about 540×300 at 72ppi, you will need to adjust the layer styles as stated. Fill the background with something so that it will make it easier to see what your doing.
Step 2
Create a new layer, and rename it Plate. Switch to the Custom Shape tool and choose Rounded Rectangle from the menu at the top of Photoshop, make sure that the Fill Pixels icon is checked and set the Radius to 20 pixels.
Step 3
Set your foreground to #e9e9e9, and the background colors to #d2d2d2 , then drag a 500×250 pixels rectangle onto the workspace.
Step 4
Since most license plates have a reflective quality that makes the surface shimmer, lets add that effect with a little noise. Select Filter>Noise>Add Noise from the main menu, set the Amount to 2% and be sure that Gaussian and Monochromatic are checked before hitting OK.
Step 5
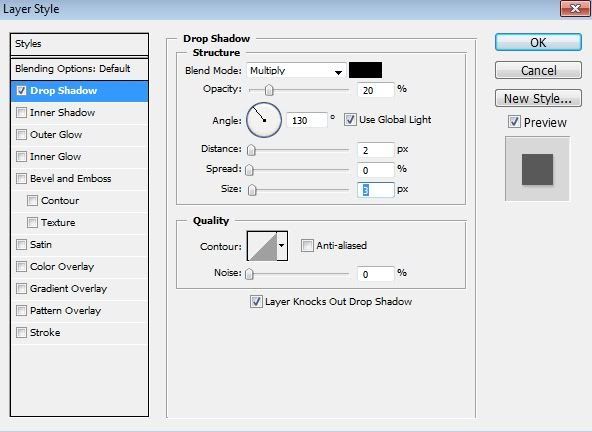
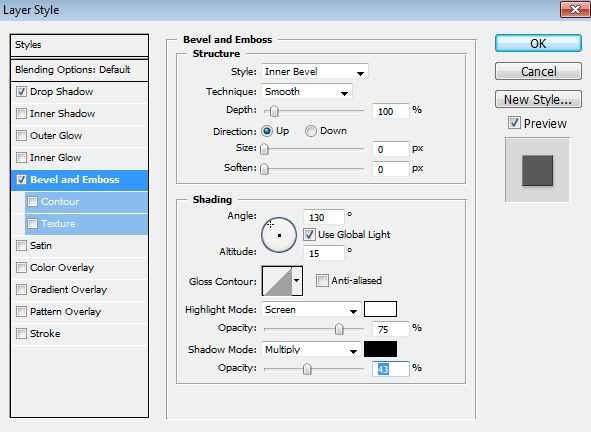
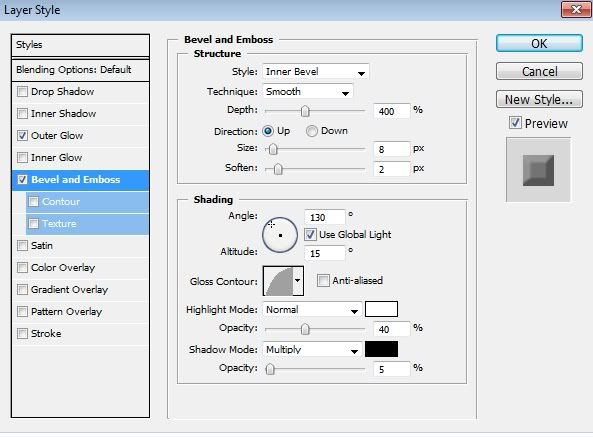
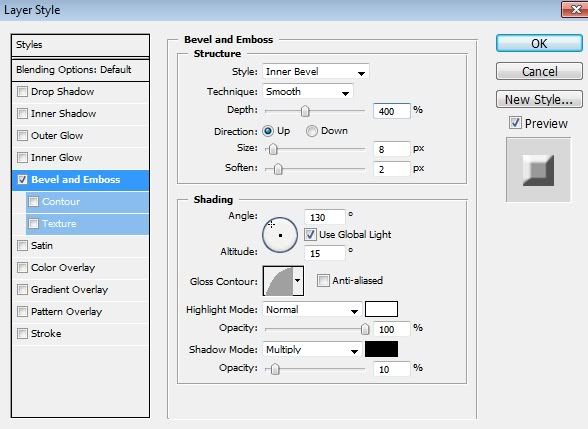
Double click next to the layer name in the Layers palette to bring up the Layer Styles dialog then add Drop Shadow and Bevel And Emboss.
Step 6
Create a new layer and call it Bevel. This is where the embossed bevel around the edge of the license plate will live. Ctrl-Click on the Plate layers icon to load the plate as a selection, the Bevel layer should still be selected as the working layer. Now click Select>Modify>Contract and set the amount to 5 pixels. Fill the area with black. Press the D key to reset the foreground color to black and then press Alt-Backspace to fill the area with black.
Step 7
Lets now contract the selection again (Select>Modify>Contract) but this time lets go 10 pixels. Press Backspace to remove the area inside the selection and then release the selection.
Step 8
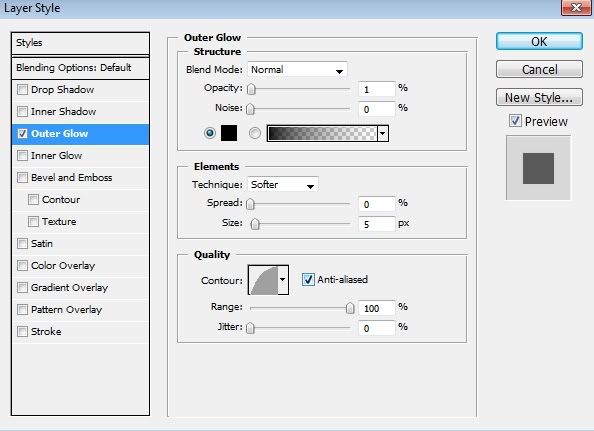
Lower the Bevel layers Fill opacity (at the top of the Layers palette) to 0% making the black outline on the layer momentarily invisible, then add the following layer styles.
Step 9
Its time to lay down the custom license plate letters. For this little number use a cool font called License Plate created by Dave Hansen. You can download it HERE. Click the Text tool, set the text color to #404d5e and use the font size is 135pt.
Step 10
Create a new layer beneath the text layer we just created by holding down the Ctrl key while clicking the Create New Layer and rename it Text Bevel. With the Text Bevel layer now selected, Ctrl-Click on the text layer icon to load the text as a selection. Now expand the selection by 5 pixels by using the Select>Modify>Expand option in the main menu and fill the selection with Black. Go ahead and Ctrl-D when youre done to release the selection.
Step 11
Just like you did with the Bevel layer in Step 8, drop the Text Bevels Fill opacity to 0% and add the following Bevel And Emboss layer style.
Step 12
If youve switched tools get the Type tool back. Set the text color to #c02922, switch to the font Mistral which you can download HERE . This is the font the California logo on the license plate is based on. Click on the workspace and type the word California unless of course you want a license plate from somewhere else, and in that case, youre on your own. Lower the Fill opacity of the California layer to around 80%.
Step 13
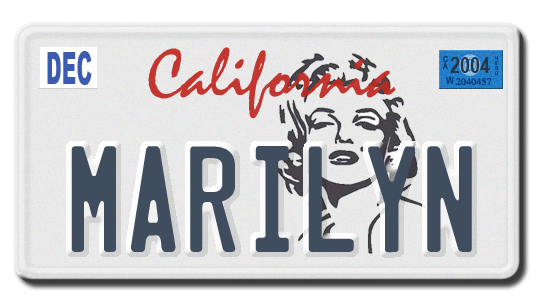
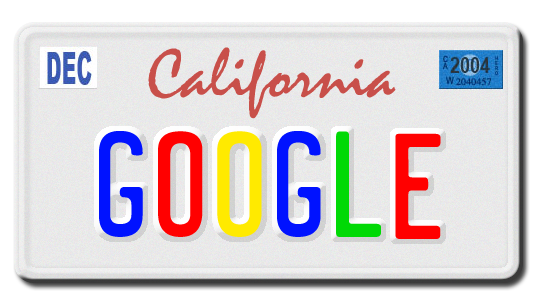
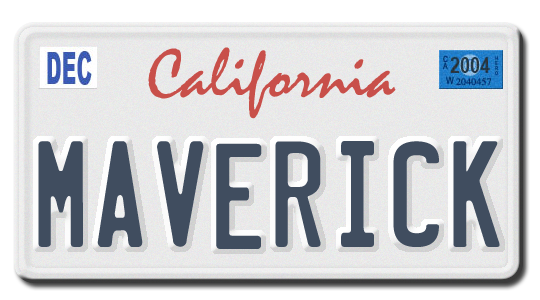
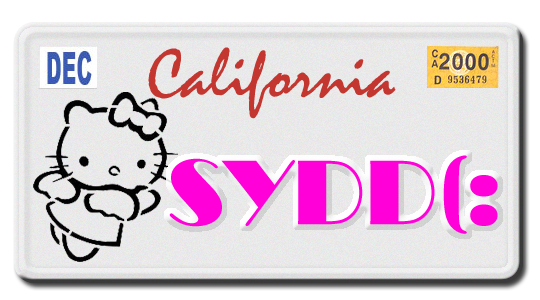
To add the stickers go to google and find a license plate pic and copy/paste them in, or take them from the following examples of what your license plate should look like.
Examples:
Results 1 to 1 of 1
Hybrid View
- 02 Jan. 2011 02:01pm #1Reply-Inducing


- Age
- 33
- Join Date
- Dec. 2009
- Location
- Under your bed! O_O
- Posts
- 1,710
- Reputation
- 40
- LCash
- 91.85
- Awards


 California Liecence Plate using Photoshop Signature removed by Artificial. Too awesome for my eyes to see every time I log on.
Ever wanted to trade our battle pokemon using an emulator?
Learn how to do so here


 LinkBack URL
 About LinkBacks

 Reply With Quote